


1 min read
Condition Monitoring – Don’t Have Stored Fuel Without It Part 5
This summer we hosted a webinar called Condition Monitoring for Stored Fuels. During the webinar we explained what condition monitoring is and the...
10 min read

This summer we hosted a webinar called Condition Monitoring for Stored Fuels. During the webinar we explained what condition monitoring is and the key elements of condition monitoring, why it’s important, and how you should be doing it. You can watch the recording of the webinar here, or you can read the transcript in this five-part series.
Now, once you have your samples, you're going to, you know, what are you going to do with them? I mean, great, you've got good samples, but you're pulling samples because you're going to do something with them, right? In this case, you want to see what they can tell you about the condition of your fuel and the condition of your tank. That means you've got to test them, right? And when you test samples, you generate data, but in and of itself test data from samples doesn't mean anything in and of itself if you don't have the context to give it meaning.
Now, what do we mean by that? That sounds like kind of an academic statement, well, let's explain that. Let's use the example that we're doing microbial count testing. And we've got a sample. And so, we get our microbial count back, and it is X. It's 12,000 microbes per milliliter, something like that. Now, 12,000 microbes per milliliter doesn't mean anything in and of itself; it's just a number. What we need to know is 12,000 good? Is it bad? Is it a huge problem? You know, that's the context. You need to have a benchmark or a standard to give it meaning.
Now, a typical benchmark for fuel would be that if you have more than 10,000 microbial units, then that typically indicates a problem. But the key word in that phrase is 'typically.' Now, what do we mean by that? Well, 10,000 microbial units, excuse me, 10,000 might be a problem for some tanks, many tanks even, but not necessarily every single one. Not to mention that we don't know what kinds of microbes are making up that 10,000. Because remember, there are thousands and thousands and thousands of different kinds of microbes, some of them are harmless and innocuous. Some of them are really, really, really bad. How many of those 10,000 units are the really bad ones? We don't really know.
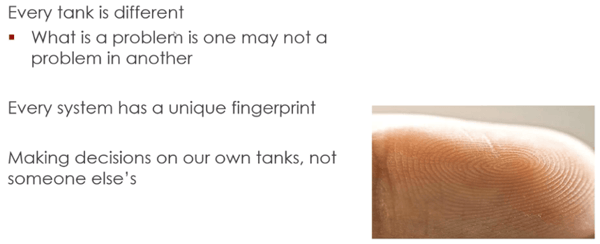
So when you get down to it, every tank environment is actually different. The environment for a hospital up in North Carolina, the environment in that tank is going to be different from a hospital, from a storage tank at a 7-11 convenience store in Ocala, Florida, or Topeka, Kansas. We like to say that every storage tank in every place has its own fingerprint, and that means that standards for what's a problem in that might vary a little bit from tank to tank.
Now up until the recent past, we didn't really have a usable method to be able to determine what a tank fingerprint was in this context. Luckily, we now do have the ability to figure out what the fingerprints of our own tanks look like. To see whether a given microbe count is actually a problem or not. Instead of having to base our decisions on generalized conclusions based on what everyone else's tanks are like.
Now, the only way to get the fingerprint of your ... Or to get the right fingerprint for your specific tank or fuel system is to do trending. And trending requires you to take multiple samples and test multiple samples over a given period of time. Now, when you're doing trending, you start with a baseline. The baseline is the starting point, the benchmark. You collect ... You figure this out just after the system is cleaned. Some people recommend you do it after a system's newly constructed but, that's not feasible for most of us. So, you collect baseline or benchmark data, just as after the system's cleaned, so you're starting your starting point.
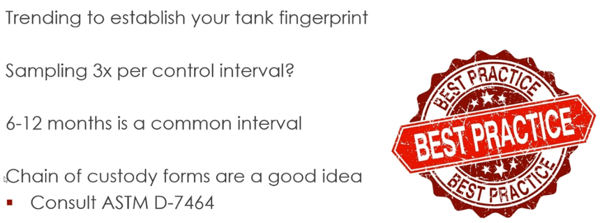
Then what you do is, you sample three times for every ... Or during, the given control interval for your tank. Now, what do we mean by controlling? Well because, some of you are probably thinking, "This is starting to sound kind of complicated." Well, trust me, it's not as complicated as it might sound once we explain what we're talking about here. Control interval, if you were to do testing on a tank, right? And you collect ... Let's say you collect samples every two weeks or every month or whatever, for a period of time. What you would be able to see is you would be able to see the microbe levels in your tank change overtime, right? And what you tend to see ... What usually happens is that overtime, in a given tank, they rise, right? They rise and they rise, and they rise because the microbes are living and growing and doing what they do.
Eventually, they're going to rise to a point where they're going to cause problems. A point ... It may be that 10,000 microbe equivalent. It maybe something else, but there's going to be some point for your system where a given number of microbes are likely to cause problems. And at that point, you would take action, right? You would use a biocide or something to clean the tank and you ... To try and knock those numbers back down. The control interval is the amount of time it takes to go from baseline to problem. That's easy enough, right?
So, the recommendation is to sample three times for whatever the control interval is for your tank. Now, what is the control interval for your tank? Well again, if your tank has its own fingerprint, then the way to figure that out is to do trending and to, test samples over a period of time. And within you know, six months or a year, whatever. You get ... You see what the answer is for your tank. Now, to make a generalization, a common control interval for a lot of tanks is between six and 12 months. So that means if you were trying to figure out a good starting point as far as, how often do I test? You know, everyone to two months might work.
So, the takeaway here is that you need to get enough data often enough to figure out what your ... The true control interval should be for your tank. The last thing on this slide here talks about the chain of custody. So a quick note on that is, it's always best practice when you're working with fuel samples and working with fuel samples that are going to be tested. It's always best practice to implement some kind of chain of custody documentation. Whenever samples are to be collected to be tested at a later time and place. Now typically, chain of custody's are a form, a CRC Form, Chain of Custody form. And the chain of custody form needs to get enough information to document who had the sample, at what period of time, what's going to be done with the sample and who’s going to be doing it, or who did the work.
Now, if you want more information on what makes a good chain of custody form, that's actually a section in the ASTM D-7464. It specifically talks about the kinds of things that a good chain of custody form should have. So, you can consult that, or you can consult us because we have information on that as well.
So, having acknowledged the importance of the chain of custody form, this should lead us to consider this important area of sample handling. Now, this is something that is really important, okay. We need to say a few things about the issue of time sensitivity when comes to handling samples for microbial testing. Typically, when you pull samples whether ... Not just for microbial testing for anything. How quickly you need to test or how quickly you need to analyze whatever samples you pull, depends on what you intend to do with them. Now, if you're pulling a sample and you just want to test fuel properties like seitan value or oxidative stability, something like that. You generally have more time to act because those kinds of tests aren't really time sensitive, so to speak.
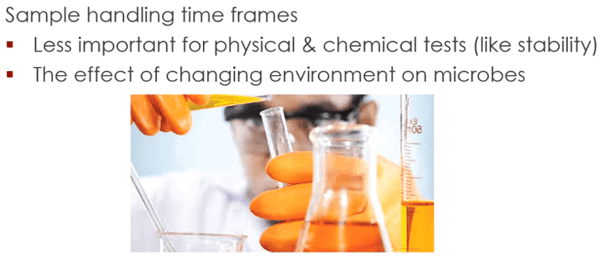
But the exact opposite is true if you're pulling samples for microbial analysis because in that case ... And this is really important to stress. Time really is of the essence there. Now, consider microbes are living organisms. So, they've been living and growing; they're probably born in this storage tank environment, that's all they've ever known, right? You sample them, you pull some of them out in a sample, and you take them out of their normal environment. Well, what's going to happen to those? Typically, they're going to react in some kind of adverse way. They're either going to grow, or they're going to die. And if either one of those happens, that weakens the relationship between the test results that you're getting from that sample and the state of the tank that they came from.
So, three scenarios could happen here, right? You pull a sample, and you do the testing. Now, the first scenario is the best-case scenario in that; the microbial population is reality, doesn't change. Which means, what you've tested... That what you find on your test, is for the most part, what's actually present in the environment. So, yeah. That's good, that's the best-case scenario.
But, a second scenario would be that the microbes actually ... The microbes in the sample, actually start to grow at a faster rate than they do in the tank because, maybe they like being in that sample, right? So, this isn't ideal because when you test them, you're going to get a higher count than what was in your tank. And that's not ideal, but it's better than the alternative because at least, you can see qualitatively that there is some kind of microbial presence in there.
The third one is the one that we want to avoid. Which is that the microbes don't like being in that sample, and they actually die off, either in part or in whole. And what that does is that leads you to a false negative test reading. You test it, you record that there are no microbes, but there are actually tons of microbes in your tank. And that's a problem. The rule of thumb here is that the longer the amount of time passes between sample collecting and testing, the weaker the relationship is between what you see in the results and the actual state of the microbiome, so to speak, that's in your tank or your fuel system.
Now, considering that, okay. If time is of the essence, how quickly do you want to have microbial analysis done if you've pulled the sample?
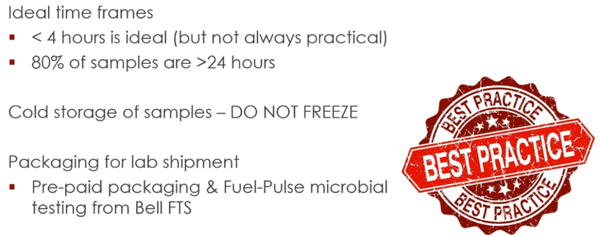
Well, the ideal timeframe is four hours. Now, that's the ideal, that's the best case. But those of us who do this kind of stuff out in the real world, we know that it is actually pretty rare that you can meet the ideal. In reality, 80 ... If you talk to field microbiologists, they'll tell you that like, 80% of the samples that they get, are ... They're not just older than four hours. They're older than 24-hours. And, if you're pulling a sample from your tank and you have to send it off to someone to get microbial testing. Then it's obviously going to be more than 24-hours before it reaches them. So, what do you do about that? How do you get around that?
Well, the general recommendations are, first of all. When you're pulling samples, you want to have a cooler with some ice. You put your fuel samples in your clean, sterile containers and you put them on ice to slow any possible microbial growth. And, if they're in a cooler, they're easier for you to transfer wherever you need to go. Now, if you're going to do the microbial testing yourself like IE: if you've got the kind of equipment that you would need to do some of this next generation ATP testing if you've purchased some of it. Then you can pretty easily test within that four-hour window, and you're good. But most commonly, most people don't have that kind of equipment. So, most commonly what happens is that, they'll send the samples off to a third party to do microbial testing.
Now, if this is what you're going to need to do. Well then, what you're probably going to have to do is, you're probably going to have to put those samples in the refrigerator. Unless you're going to package them up immediately once you get back to your facility and mail them off. So, either one of those really important steps to slow any additional microbial growth. Try and keep your samples as representative as possible. Now, one thing you do not want to do, and I put it in capital letters on the slide because it's important. Yeah, you want to put them in the refrigerator. You do not want to put them in the freezer because the process of freezing and thawing and freezing and thawing will kill off part of your microbial population and you do not want that.
Now, if you're going to ship fuel samples, you have to package them properly, right? Well, there are certain guidelines that require you to do things like, you have to put absorbent material in the package. They want you to use like, a sealable transport bag so that if it leaks, it's going to stay within the bag. So there are regulations for that, and that can be a little daunting for some people. So, one of the things that we do is that we actually have a prepackaged kit that people can buy that will actually, give them everything that they need to package up two samples. A bottom sample and a middle sample, and mail them by two to five day ... Or depending on where you are in the country like two-day ground. And, to actually then also, pays for the cost of the test. So, if you're in a position where you're thinking, "Yeah, we need to start doing this but I can't do the testing myself. And, I don't really know what I need to package everything up." Then, there is that option out there and if that's something that you need more information on then definitely, you can talk to me afterwards.
Okay. Gary wants to know, "What's the length of the webinar?" We are almost done. We have two more slides. So, I know that some of this stuff can tend to run a little long. But yup, we are almost done. There's just so much detail, important detail to cover in here. So, let's wrap this up and then, I'll try to get to Bill and Sean's questions.

So basically, all those things ... Those are the essential considerations that you need to know about condition monitoring. If you have mission-critical stored fuel, it's especially important for you to keep that in mind. So at this point, what we typically do is we do a quick review of what we covered in the seminar. So, after we went through, we talked about the basics of fuel microbiology. And then we dug into this whole condition monitoring thing. And we talked about proper sampling, proper handling materials. We talked about the fact that, sampling controls what you see. So it is imperative that your samples are obtained using best practices so that they can accurately reflect what you see.
If you're doing microbial testing, you need to pull a bottom sample that contains water, contains biofilm, and it contains some of the near bottom fuel. We talked about how important it was to take samples over a period of time to establish a trend in your tank to enable you to see what problem levels are, and how often you need to take action, right? And we established that proper sample handling includes stuff like, keeping samples cold and of course, getting tested as quickly as possible. These play a really, really important role in making sure you can make an accurate determination about the state of your fuel and what you need to do next. And see, that's the thing, right? You need to know if you have a problem. I mean, that's part of the whole reason you're doing this kind of thing.
But, just as important as finding out when you have a problem. It's also important that you don't get a false impression that you have a problem when you don't. Because, none of us have the time or the money to waste chasing our tails if we've been led to believe that we have a problem that we actually, don't have. So both of those are important. Detecting problems to make sure that they don't become bigger ones is an issue. But you also don't want to waste time and money doing something you didn't need to do.
This is Condition Monitoring Part 3. You can read Part 1 here, Part 2 here, and Part 3 here. Part 5 is here.
Watch the full presentation below:
1 min read
This summer we hosted a webinar called Condition Monitoring for Stored Fuels. During the webinar we explained what condition monitoring is and the...
1 min read
This summer we hosted a webinar called Condition Monitoring for Stored Fuels. During the webinar we explained what condition monitoring is and the...
1 min read
This summer we hosted a webinar called Condition Monitoring for Stored Fuels. During the webinar we explained what condition monitoring is and the...